
Theodore Lowe, Ap #867-859
Sit Rd, Azusa New York
Find us here
How to Isolate Hair for Background Removal in Photoshop
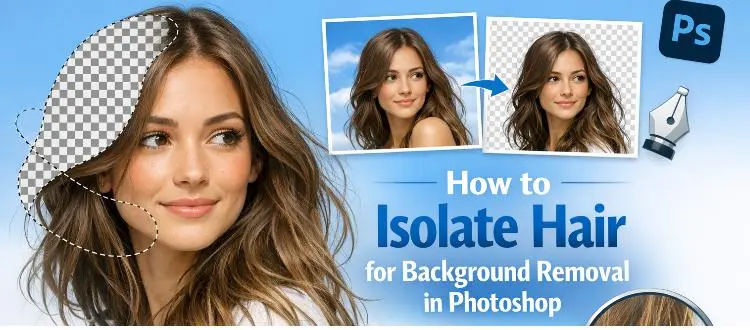
The struggle to achieve clean edges when removing backgrounds is a common frustration, especially when dealing with the fine details of hair. Imagine effortlessly transforming your images with precision, making every strand of hair look naturally cut out, as if by magic.
This guide will reveal the secrets to mastering this essential Photoshop skill, turning a daunting task into a breeze. Ready to elevate your photo-editing game and impress everyone with your flawless results? Dive in and discover how to make every image pop with professional-grade quality.
Understanding Hair Isolation
Hair isolation is crucial in photo editing. It helps create clean backgrounds. The process involves separating hair from complex backgrounds. This task can be tricky. Especially with fine strands and wisps. Photoshop offers tools to simplify this.
Importance Of Clean Edges
Clean edges ensure realistic photo edits. They prevent awkward transitions between hair and background. Smooth edges help maintain natural appearance. Photos look polished with well-defined edges. This is vital in professional editing.
Challenges In Hair Isolation
Hair isolation presents unique challenges. Hair has complex textures and shapes. Stray strands complicate the process. Curly and frizzy hair require extra attention. Lighting and shadows add difficulty. Photoshop tools must be used carefully. Selecting the right tool is essential.
Photoshop Tools For Isolation
Creating clean edges for background removal in Photoshop can feel like a daunting task, especially when you're trying to isolate intricate hair details. Luckily, Photoshop offers powerful tools specifically designed to help you achieve precise isolation. These tools can make the task easier and more efficient, allowing you to focus on crafting your perfect image.
Quick Selection Tool
The Quick Selection Tool is one of your best allies for isolating hair. It operates like a digital brush, allowing you to "paint" over the areas you want to select. Its strength lies in its ability to detect edges and differentiate between contrasting areas, making it perfect for capturing hair strands.
To use it effectively, adjust the brush size according to the complexity of the area you’re working on. A smaller brush works wonders for capturing finer details. Remember to zoom in on your image for better accuracy. If you accidentally select more than you intended, simply hold down the "Alt" key (or "Option" on Mac) and paint over the excess selection to deselect it.
Refine Edge Brush
The Refine Edge Brush is a game-changer when it comes to perfecting your selections. After using the Quick Selection Tool, you might find some areas where the selection isn't quite right, especially around hair. This is where the Refine Edge Brush steps in.
Access the Refine Edge option by clicking "Select and Mask" from the selection toolbar. The Refine Edge Brush lets you meticulously adjust the edges of your selection. It’s especially useful for tackling the wispy, flyaway hairs that are often missed by other tools.
As you use this brush, you'll notice how it intelligently adapts to different textures, ensuring the most natural edge. Play around with the "Edge Detection" settings to customize your adjustments. The "Smart Radius" feature helps in automatically differentiating between hard and soft edges, which is crucial for hair isolation.
Have you ever struggled with isolating hair in your photos? These tools can transform your editing experience, making the process not only manageable but enjoyable. Take a moment to experiment with them, and see how they can elevate your photo editing skills.
Step-by-step Isolation Process
Have you ever struggled with isolating hair in Photoshop for a perfect background removal? You're not alone. Many find it challenging, yet mastering this skill can transform your editing process. Let's dive into a step-by-step isolation process that will help you achieve clean edges and seamless results.
Preparing The Image
Start by opening your image in Photoshop. Ensure it's high resolution; this provides more detail and makes isolation easier. Zoom into the hair area to see the strands clearly. Adjust the brightness and contrast if necessary. This helps differentiate the hair from the background. Have you noticed how clearer images make editing more intuitive?
Using Selection Tools
Selection tools are your best friends for isolating hair. Use the 'Quick Selection Tool' to roughly outline the hair. You can refine this with the 'Lasso Tool' for more precision. Experiment with different tools to see what fits your image best. Have you tried using the 'Magic Wand Tool'? It can be a game-changer for areas with uniform color.
Refining The Edges
Refining edges is crucial for a realistic look. Go to 'Select' and choose 'Refine Edge'. Adjust the sliders for smoothness and feathering. Focus on the 'Edge Detection' to accurately capture the hair's fine strands. Check the 'Decontaminate Colors' option to remove any background color bleeding. Does this step make you feel more confident in your isolation skills?
Give it a try and see how these techniques enhance your Photoshop projects. What challenges do you face in isolating hair? Share your thoughts and experiences below!
Advanced Techniques
Advanced techniques for isolating hair in Photoshop offer precision. They help achieve clean edges for background removal. These methods enhance the quality of your images. Dive into detailed processes like layer masking and channel-based isolation. Each technique serves a unique purpose. They provide tools for achieving seamless results. Understanding these methods can transform your editing skills. Let's explore these techniques in detail.
Layer Masking
Layer masking offers control over image edits. It helps in creating smooth edges around hair. Use a soft brush for refined lines. Adjust the opacity for gradual transitions. This technique preserves original image details. It allows non-destructive editing. You can easily undo changes. Layer masking provides flexibility in making adjustments.
Channel-based Isolation
Channel-based isolation focuses on individual color channels. It extracts hair from complex backgrounds. Select a channel with high contrast. Use it to create a precise selection. Adjust levels to enhance separation. Fine-tune edges with the Refine Edge tool. This method isolates even the finest strands. Channel-based isolation is ideal for intricate details.
Tips For Realistic Results
Creating a clean cut-out of hair in Photoshop can be tricky. Achieving realistic results requires attention to detail. You need to focus on the small aspects. These tips will help you isolate hair effectively. And maintain a natural look in your images.
Handling Difficult Hair Textures
Curly or frizzy hair can be hard to manage. Use the Refine Edge tool to handle this. It lets you adjust the edges precisely. Zoom in closely to see the details. Focus on small sections at a time. This method helps in capturing every strand. Remember, patience is key. Each texture needs a slightly different approach.
Maintaining Natural Look
The final image should look natural. Avoid harsh lines or unrealistic edges. Use the Feather tool to soften the edges. It blends the hair with the background smoothly. Check the colors and lighting. They should match the background. This ensures the hair looks like it belongs in the scene.
Common Mistakes To Avoid
Avoid common errors when isolating hair in Photoshop. Ensure clean edges by carefully using selection tools and refining masks. Keep an eye on fine details to prevent unnatural cut-outs.
In the quest for clean edges when isolating hair in Photoshop, common mistakes can hinder your progress. Knowing these pitfalls helps achieve professional-looking results. Focusing on essential techniques reduces errors and improves your editing skills. Explore these frequent mistakes to ensure your hair isolation projects shine.
Over-smoothing Edges
Over-smoothing leads to unnatural hair appearances. It often erases essential hair texture. Maintain texture to keep a realistic look. Use minimal smoothing to preserve hair's natural flow. Balancing edge smoothness with detail is crucial. Excessive smoothing can make hair appear painted or artificial. Always compare with the original image to gauge accuracy.
Ignoring Background Details
Background details often blend with hair. Ignoring them can ruin your isolation efforts. Subtle background tones may intertwine with hair edges. Overlooking these can result in jagged or rough cutouts. Check for shadows, reflections, and color overlaps. Addressing these details enhances the final image's quality. Careful observation is key to avoiding these mistakes.
Practice And Mastery
Learning to isolate hair for background removal in Photoshop is a skill that demands practice and mastery. The subtleties of this technique can transform your images, making them look professional and polished. But how do you get from a beginner to an expert? The answer lies in consistent practice and the willingness to continuously learn and adapt.
Experimenting With Different Images
One of the best ways to develop your skills is by experimenting with various types of images. Start with images that have simple backgrounds and clear hair outlines. As you build confidence, challenge yourself with more complex images featuring intricate hairstyles or messy backgrounds. This gradual increase in difficulty will help you refine your techniques.
Consider how different lighting conditions affect the edges of hair. Bright lights may create reflections, while dim settings might blur details. Adjust your approach accordingly to achieve clean and sharp edges.
Experimentation also involves using different tools within Photoshop. Have you tried the Refine Edge tool? Or perhaps the Select and Mask feature? Each tool offers unique benefits, and exploring them will expand your skill set.
Continuous Learning
Even seasoned professionals know the importance of continuous learning. Photoshop updates regularly with new features and tools. Keeping up-to-date allows you to leverage these advancements in your work.
Join online forums and communities where Photoshop enthusiasts discuss techniques and share tips. Engaging with others can provide insights you might not have considered. Have you ever learned something new just by watching someone else work?
Consider enrolling in online courses or workshops. These structured learning environments can enhance your understanding and introduce you to advanced methods. The key is to never stop learning and to always seek out opportunities for growth.
So, what's stopping you from mastering the art of hair isolation? Dive into the practice, experiment bravely, and embrace continuous learning. With dedication, you will see your skills flourish.
Conclusion
Mastering hair isolation in Photoshop takes practice. Start with easy projects. Use these techniques to improve your skills. Clean edges make your images look professional. Experiment with tools to find your favorite. Consistency is key for quality results. Keep learning and trying new methods.
This builds confidence. Remember, patience leads to success. With time, background removal becomes faster. Your images will stand out. Happy editing!
Related blog posts
Clipping Path Associate has empowered businesses globally for over 12 years. A passionate team is dedicated to providing meticulous photo editing services. Expertise is offered in a range of areas, from precise clipping paths to flawless image retouching. The company offers straightforward yet impactful solutions tailored for photographers, e-commerce enterprises, advertising agencies, web design firms, magazine publishers, printing companies, and more.
We Accept : 