
Theodore Lowe, Ap #867-859
Sit Rd, Azusa New York
Find us here
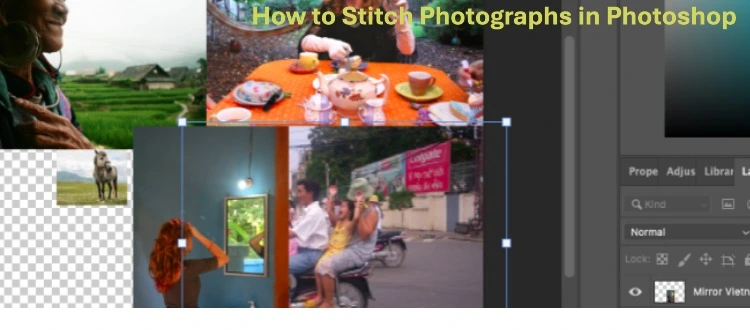
How to Stitch Photographs in Photoshop
Photoshop offers powerful tools for creating stunning panoramic images. Beginners can easily learn to stitch photos together using the Photomerge feature. This process involves selecting multiple photos and letting Photoshop automatically align and blend them. The result is a seamless, professional-looking panorama.
With some practice, anyone can create breathtaking stitched images. This guide will walk you through the steps to achieve perfect results. Whether you are a budding photographer or a hobbyist, mastering this skill will enhance your creative projects. Read on to discover how to transform your individual shots into cohesive, panoramic masterpieces.
By using Photoshop for photo stitching, you can create stunning panoramic images with ease.
Preparing Your Photos
Before you start stitching photos in Photoshop, preparation is key. Proper preparation ensures your final image looks flawless. Follow these steps to get your photos ready.
Choosing The Right Photos
Choosing the right photos is the first step. Photos should have overlapping areas. This helps Photoshop align them perfectly. The overlap should be around 30%. Ensure photos are of high quality. Avoid blurry or dark images. Consistency in lighting and exposure is also important. This makes the stitching process smoother.
Organizing Your Files
Organizing your files is crucial. Create a dedicated folder for your project. Name your photos in sequence. This helps in easy identification. For example, use names like photo1.jpg, photo2.jpg, etc.
Here's a simple way to organize:
-
Create a folder named "Stitching Project"
-
Place all your photos inside this folder
-
Rename your files in order
Proper organization saves time and avoids confusion. It ensures a smooth workflow.
Setting Up Your Workspace
Setting up your workspace in Photoshop is crucial for a smooth workflow. It helps you stay organized and efficient. Let's dive into the steps to get your workspace ready.
Opening Photoshop
First, you need to open Photoshop. Follow these steps:
-
Click on the Photoshop icon on your desktop or in your applications folder.
-
Wait for the program to load.
-
Once loaded, you'll see the main interface.
Adjusting Photoshop Settings
Proper settings can make your work easier. Follow these steps:
-
Setting up Preferences
-
Go to Edit > Preferences > General.
-
Adjust settings according to your needs.
-
-
Customizing the Toolbar
-
Click on the three dots at the bottom of the toolbar.
-
Drag and drop tools to arrange them.
-
-
Setting Up Panels
-
Go to Window in the top menu.
-
Select the panels you need, like Layers and History.
-
A well-organized workspace helps you focus. Keep tools and panels in easy reach. It saves time and effort.
Importing Photos
Importing photos into Photoshop is the first step in stitching photographs. This guide will help beginners bring their photos into Photoshop. You will learn two easy ways to import photos: using the file menu and dragging and dropping.
Using The File Menu
To start, open Photoshop and follow these steps:
-
Click on the File menu at the top left.
-
Select Open from the dropdown menu.
-
A window will pop up. Find the photos on your computer.
-
Click on the first photo. Hold the Shift key and click on the last photo to select multiple files.
-
Click Open to import your selected photos.
Dragging And Dropping
This method is quick and simple. Follow these steps:
-
Open Photoshop on your computer.
-
Find the photos on your computer using a file explorer.
-
Select the photos you want to import.
-
Drag the selected photos into the Photoshop window.
-
Drop them into the workspace. Your photos will appear in Photoshop.
These methods make importing photos into Photoshop easy. Choose the one that works best for you. Now, you are ready to start stitching your photographs.
Aligning And Blending Photos
Aligning and blending photos in Photoshop can seem daunting for beginners. This guide will help you master these techniques easily. Learn how to use auto-align layers and blending options in a few simple steps.
Using Auto-align Layers
First, open your images in Photoshop. Ensure each photo is on a separate layer. Select all layers you wish to align.
-
Go to Edit in the top menu.
-
Select Auto-Align Layers.
-
Choose the Auto option in the dialog box.
Photoshop will now align your layers automatically. This step ensures your images are perfectly matched.
Blending Options
With layers aligned, it's time to blend them. This will make the transition between photos seamless.
-
Select all aligned layers.
-
Right-click and choose Convert to Smart Object.
-
Go to Layer in the top menu.
-
Select Layer Mask > Reveal All.
Use the Brush tool to paint on the mask. This will blend the edges of your photos smoothly.
|
Step |
Action |
Result |
|---|---|---|
|
1 |
Select Layers |
All photos are selected |
|
2 |
Auto-Align |
Layers align perfectly |
|
3 |
Blend |
Seamless photo transition |
These steps ensure your photographs align and blend correctly. You can now create stunning panoramas or composites.
Refining The Stitch
Refining the stitch is crucial to create a seamless panorama in Photoshop. This stage involves fine-tuning the alignment and appearance of the stitched images. Mastering these techniques will ensure your final image looks natural and professional.
Using Layer Masks
Layer masks are essential for blending the edges of your stitched images. Follow these steps to use layer masks effectively:
-
Select the layer you want to mask.
-
Click the Layer Mask icon at the bottom of the Layers panel.
-
Use the Brush Tool to paint over the areas you want to hide or reveal.
-
Adjust the brush size and hardness for more precise control.
Layer masks allow for non-destructive editing. You can always modify them later.
Adjusting Colors And Exposure
Color and exposure adjustments are vital for a cohesive panorama. Follow these steps:
-
Select the layer you want to adjust.
-
Go to Image > Adjustments > Levels for exposure control.
-
Use Image > Adjustments > Color Balance for color adjustments.
-
Match the colors and exposure of all layers for a uniform look.
Use adjustment layers for non-destructive changes. This allows you to tweak settings at any time.
By refining the stitch, you can ensure your final image looks professional and seamless. Use these techniques to enhance your Photoshop skills and create stunning panoramas.
Saving And Exporting
Saving and exporting your stitched photographs is a crucial step in Photoshop. This ensures your hard work is preserved and ready for sharing or further editing. Let’s dive into how to save and export your project effectively.
Saving Your Project
To save your work in Photoshop, follow these steps:
-
Click on File in the top menu.
-
Select Save As from the dropdown menu.
-
Choose a location on your computer.
-
Name your file and select Photoshop (.PSD, .PDD) as the format.
-
Click Save.
Saving in the PSD format keeps all your layers and edits intact. This is useful if you need to make changes later.
Exporting The Final Image
Once you are happy with your stitched photograph, export it as a final image. Follow these steps:
-
Go to File in the top menu.
-
Select Export then click Export As...
-
Choose the format you prefer (JPEG, PNG, etc.).
-
Adjust the image size and quality settings.
-
Click Export and select a location to save the file.
JPEG is great for web use because it balances quality and file size. PNG is ideal for images requiring transparency.
|
Format |
Best For |
|---|---|
|
JPEG |
Web use and general sharing |
|
PNG |
Images with transparency |
|
TIFF |
High-quality prints |
Choose the format that best suits your needs. Exporting your image correctly ensures it looks great wherever you use it.
Common Issues And Fixes
Stitching photographs in Photoshop can be tricky for beginners. You may face several issues that can affect the final output. Here, we will discuss some common issues and how to fix them.
Dealing With Misalignments
Misalignments occur when the edges of photos do not match. This can result in a jagged or uneven panorama.
-
Use the Auto-Align Layers: Select all layers, then go to
Edit > Auto-Align Layers. Choose Auto for best results. -
Manual Alignment: Use the Move Tool to manually adjust each layer. Zoom in to check edges closely.
-
Layer Masks: Apply layer masks to blend edges seamlessly. Use a soft brush for smooth transitions.
Correcting Distortions
Distortions can make your panorama look warped or stretched. This happens due to the different angles of the photos.
-
Lens Correction: Go to
Filter > Lens Correction. Use the Custom tab to adjust the distortion. -
Warp Tool: Select the layer, then go to
Edit > Transform > Warp. Adjust the grid points to correct the distortion. -
Content-Aware Fill: This helps to fill in the gaps created by distortions. Go to
Edit > Content-Aware Fill.
Here is a quick reference table for these fixes:
|
Issue |
Fix |
|---|---|
|
Misalignments |
Auto-Align Layers, Manual Alignment, Layer Masks |
|
Distortions |
Lens Correction, Warp Tool, Content-Aware Fill |
Tips And Best Practices
Creating seamless panoramas in Photoshop can be easy with some tips and best practices. These suggestions will help you achieve consistent and high-quality results.
Maintaining Consistency
Consistency is key to creating a seamless panorama. Always shoot in the same lighting conditions. Ensure the camera settings remain unchanged.
Use the same aperture, shutter speed, and ISO for all shots. This ensures uniform exposure and color balance.
Using Tripods For Better Results
A tripod is essential for capturing consistent images. It keeps the camera steady and at the same height.
Use a panoramic head for smooth rotation. This helps in capturing overlapping images without distortion.
|
Tip |
Explanation |
|---|---|
|
Overlap Images |
Ensure at least 30% overlap between shots for better stitching. |
|
Manual Focus |
Use manual focus to avoid changes in focal length. |
Follow these tips and best practices to create stunning panoramas in Photoshop. Happy stitching!
Conclusion
Mastering photo stitching in Photoshop can elevate your photography skills. Practice makes perfect, so keep experimenting. Soon, you'll create stunning panoramic images effortlessly. Share your creations and inspire others. Happy stitching!
Related blog posts
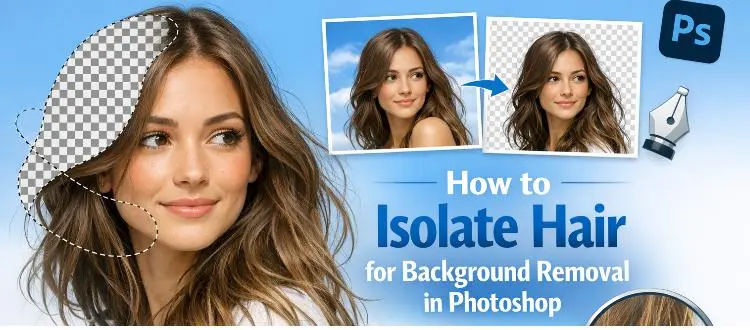
How to Isolate Hair for Background Removal in Photoshop
Are you tired of spending hours trying to perfectly isolate hair from a background in Photoshop, only to end up with messy, unnatural edges? You're not alone.
Clipping Path Associate has empowered businesses globally for over 12 years. A passionate team is dedicated to providing meticulous photo editing services. Expertise is offered in a range of areas, from precise clipping paths to flawless image retouching. The company offers straightforward yet impactful solutions tailored for photographers, e-commerce enterprises, advertising agencies, web design firms, magazine publishers, printing companies, and more.
We Accept : 